Tuesday, June 17, 2014

Post Critique Animation Fix


Some times it takes others to point out what you are missing. This is one of those cases. As the creator, I knew the back story behind the scene that I originally animated. Due to this, I didn't watch my animation from the viewpoint of a viewer who knew nothing about what I was doing. I did know I was missing something, but what? the "why" part. "Why was she running?" That is where the critique from others came into play, and jarred my brain to create the missing pieces. 
I really utilized sound effects to connect the dots, and add life. The following is the result:


Sunday, June 15, 2014

Rising Up

As this course whines down, I am leaving with a lot more knowledge to be successful within Media Arts.  You learn and grow from your mistakes. You also have to start from the bottom to work your way up. I have found my strength in animating words and motion. My whole project will not be an animation, but it will include elements of animation. 

I plan on animating photographs and/or illustrations that reveal gender inequalities and stereotypes of a female.  Depending on the image will depend on what is animated. For example, I am planning on using the negative association of a female tattoo coined 'tramp stamp'. I might have an image of a girl's lower back tattoo and animate that tattoo. 

I learned making a part of a story as an animation is a lot of work. The key to it being successful is the initial thought of how you want it to go from beginning to end. The next important thing is getting all of the accurate poses and transitions correct. When these lack, the whole thing can crumble. For my Media Arts project, I need to make sure I have a solid idea and not leave gaps. I am in the process of thinking of how to combine and connect the overall project. I have what inequalities/stereotypes I want to use, and an idea of how I want to execute the visuals, but can't think of how to make it all work together.   


“Our greatest glory is not in never failing, but in rising up every time we fail.” 

Process: Difficulties


I learned later on in the making that adding on and adjusting the layers was extremely difficult in timeline animation. I originally started in frame animation, but this type of animation was restrictive in the actual animation part. It is great for rendering each layer and time rate, but awful for effects with animation (example the smoke). I converted my frame animation to timeline, and found some things did not transfer over well into timeline. Hence the pause/gap/glitch around 14 seconds. Whatever information frame animation allowed, timeline seemed to have dropped, and vise verse. For example, the only way I could adjust the time rate for each layer would be in frame animation, and the only way I could add sound effects was in timeline. When I converted back to frame animation to adjust the frame rate, I lost all of my sound effects and when I converted back to timeline they did not return and I had to redo inputting them, placing them at the right spot, and adjusting the fade in and volume. 

Speaking specifically about my vanishing scene at the end: Timeline animation made working on an individual layer near to impossible. Shutting off all of the layers to focus on that one scene would have been a nightmare. I could have but I would have needed to make over 170 layers non-visible in order to do this. I had to scrub ahead to the scene I needed to adjust and try and figure out which layer that was on. Then the issue of adding more layers came into play to make the smoke roll in smoother. For some reason those added layers would not appear when played back. I adjusted the placement on the timeline in any way I could, but the scene would just hold or disappear. The smoke filter that Photoshop offers was able to happen when I placed it on its own layer. I could not flatten these layers down or the 'moving' of the smoke did not work. I am happy I had enough layers prior to add this alternate ending.


Process: Timeline vs Frame

Timeline vs Frame
I have been saying 'timeline' and 'frame' throughout my blogs, and this may not be easily understood to those who are not aware of the different animating techniques, in Photoshop. I certainly did not know the difference. I had to read about each from http://helpx.adobe.com/photoshop/using/video-animation-overview.html


Frame: This is the easier animation process. Think of frame animation as a roll of film. Each square has captured a moment in time. If you took consecutive photos, then each square changes just a little bit. If one was to 'play' out the roll of film, they would get the action in which they captured into stills. This is what Photoshop has done. Photoshop is able to take the layers that you created and drop them into it's own frame. The frame portion allows you to 'play out your layers'. Frame animation can be restrictive. For one, you cannot add music or sound effects. If you needed to alter a layer, or add layers, you need to delete all of the frames that were created- losing the frame rate you changed, change/add layer, then 'make layers into frames' again, then go back and change the frame rate. Frame rate is the amount of time that you want that image to run/hold for. Whether it be for 5sec or .01 of a second. Below are screen shots of my animation in the frame mode:


Timeline: I look at timeline like video editing. This option has more options, and for the most part is more flexible than the frame animation. Timeline animation uses layers which have properties you can change like transform, opacity, layer mask position, etc. This gives you much more flexibility when creating an animation. You can also scrub which lets you see what you are doing and if it is working out. I found this site to be helpful in figuring out timeline animation: http://www.tutorialboneyard.com/Pages/photoshop_timeline_animation.aspx
Unlike frames, timeline lets you add audio. A major downfall to timeline is the challenge of altering and adding new layers and adding them into the animation. I discovered this when I wanted to change the way my animation ended. I detail out this in detail in a later blog post. Below is a screenshot of my animation in the timeline form:


Process: Images


  1. Below you will find the 6 sketches of the running character I drew up in early March. I moved each pose into a separate file where I colored them. These same poses make up the 'run sequence'. I placed pose #1 down, #2 followed where #1's foot landed, pose #3 was placed where #2's launched, and so forth. I repeated this cycle over and over, with alterations of placing higher if jumping, and lower if landing. I know there should have been 'stretch and squish' poses for launching and landing. After reading a segment in " The Survivors Guide to Animation" did I realize this. I also read up on how to draw characters from this site: http://www.dragoart.com/tuts/11624/1/1/how-to-draw-action-poses.htm and utilized this image I found on google: 


2.  The following images are of my background that I rendered up in photoshop and used the same ones over and over to create the 'moving' background. I created a total of 8 base images that I shifted, stretched, skewed, and cloned areas to keep each background image within the dimensions of the animation;


3. The horse was not originally apart of my animation. I added it after I made a little running horse animation for Second Life's media arts festival. I utilized an image I found off of Google to achieve the horse running. 
I copied each individual run pose, made each it's own layer, deleted the man on the horse ( which I later replaced with the knight), and colored the horse. I placed the horse poses just like the girl character, using the feet as placement for the next pose. 


4. After I got all of my images set in their own files, I watched tutorials that I found on Youtube on how to animate in Photoshop, as well as this tutorial from Blooper Animation.


As you saw in earlier blog posts, I created separate animations for each character: the girl and horse.  

The girl animation originally had a background image I found ( I discarded that early on), and a simple black and white one I made after not liking the found image:
I did not like this one either after rendering up another animation. That is when I made the colored one. 


The next couple of blog posts will be glimpses into the breakdown of what you see in the animation.

Wednesday, June 4, 2014

Critique


Now presenting
The Escape:


( If you would like to view in bigger window click -> The Escape )


Questions, comments, concerns? Go easy on me! 

I know the ending is the weakest part, as I executed it waaaaaay after everything else. I did not like the original ending because it simply just ended. It is a challenge to put an afterthought into the program because I could not lower the opacity of the previous frame to be accurate on the next frame. I tried to make this new ending cohesive and flow with the ending credits. 

The timing is also a challenge. The characters are running, which makes for a quicker time rate, but is too quick for the viewer. If I slow it down, the actions are all jumpy and not realistic. 

Reflection

"If this business was easy, it would be a sin." 

-Hayao Miyazaki, Animerica Magazine. 1993

---

That quote tells it all. Animation is hard. We, the viewer, do not realize just how challenging animation is. We sit back and enjoy without a care in the world when we watch little Nemo swimming in the big blue, or ice crystals forming from a character’s hand. Teams of people were employed and their hair turned grey in order to make that snow flake fly!  

It is not easy to get characters to move the way you want them to or line up sound the way you want it to, and that is not even the start of what animators have to consider. Fabric, hair, grass, leaves, water, clouds, insects, animals, bubbles, rainbows, unicorns- you get my point, right- have to move also. A lot of time, we are talking years, go into making an animated movie. It took me 4 months to make one little girl run! I give credit to all animators who use whatever form of medium they choose to work with.


I loved this experience, even though a lot of it was frustrating and disappointing, I would not retract choosing this study. In March I started with an idea, and now in June I have a playable animation. In a course of 4 months I started with a thought; drew out a ton of layers that consisted of character poses, backgrounds, and effects; placed them accordingly to appear as in motion; tested out; adjusted; tested some more; added sound; altered, tested; adjusted; and finished. This knowledge and appreciation I gained is extremely satisfying. I may not have created a flawless animation, but considering where I started from, I am very happy with the end result. 

Reading Material

Animation is the youngest medium of art that mankind has created. Spanning barely over one hundred years, its history is as rich and dramatic as any other. Starting as the simple idea of an illusion of moving art by a couple clever innovators at Edison's film company in the early 1900's, it soon boomed into a mega-corporate commercial venture that employed thousands and captivated millions only decades later. It spread outside of America and took many different forms in many different countries and cultures. Today, the face of animation is very different than it ever was.
With the advancement of technology, animation has also advanced. Animation went from 2D to 3D, using one of the most common 2D programs called Flash to using one of the popular 3D programs called Maya. The methods of making a 2D animation versus a 3D animation are drastically different. Starting in 3D was not going to benefit me, so I turned my focus to 2D. Thankfully my readings of The Animator’s survival Kit and The Illusion of Life focused strictly on 2D animation.


Understanding the basics of animation involves knowing the terminology of animation. The terms I needed to understand from the start included:
2D Animation: The creation of moving pictures in a two-dimensional environment, such as through "traditional" cel animation or in computerized animation software. This is done by sequencing consecutive images, or "frames", that simulate motion by each image showing the next in a gradual progression of steps. The eye can be "fooled" into perceiving motion when these consecutive images are shown at a rate of 24 frames per second or faster.
3D Animation: The creation of moving pictures in a three-dimensional digital environment. This is done by sequencing consecutive images, or "frames", that simulate motion by each image showing the next in a gradual progression of steps, filmed by a virtual "camera" and then output to video by a rendering engine. The eye can be "fooled" into perceiving motion when these consecutive images are shown at a rate of 24 frames per second or faster.
Frame Rate: The measure of the number of frames displayed sequentially per second of animation in order to create the illusion of motion. The higher the frame rate, the smoother the motion, because there are more frames per second to display the transition from point A to point B. Also Known As: frame frequency.
Frame:  In animation, a "frame" is a single complete image out of the sequence of images comprising an animation. Taken alone, the frame is just a drawing - a piece of art. When sequenced with other drawings, it becomes an animation frame.
Key Frame: An animation key frame is a single still image in an animated sequence that occurs at an important point in that sequence; key frames are defined throughout an animated sequence, in order to define pivotal points of motion before the frames in between are drawn or otherwise created to "tween" the motion between the two key frames. One example of key frames could be an animation of a swinging baseball bat; the bat at rest would be one key frame, and the bat at the end of of its swing would be another. All other frames would be "tweened" frames.
Squash and Stretch: "Squash and stretch" refers to an animation technique used to depict exaggerated animated motion. The point of squash and stretch is to make the motions larger than life, rather than more swift, realistic, and sometimes unnoticed in passing observation.
The reason it's called "squash and stretch" is because characters and objects are shown to "squash" (become distorted or flattened) when affected by weight or gravity, and "stretch" (become elongated) when affected by momentum or other forces, in ways that are (usually) impossible in reality. A key principle of squash and stretch, however, is the fact that the object/character animated retains the same volume/apparent mass; it's simply distorted into a different shape and/or configuration to give the impression of the forces acting on it.
Tween: "Tween" is actually short for "in-between", and refers to the creation of successive frames of animation between key frames. In computer animation, the term is most commonly used for Flash's "shape tweening" and "motion tweening" processes, where the user can define two key frames and Flash will automatically create the in-between frames, either morphing one shape into another over a set period of time or else moving a shape or shapes from point A to point B over a set period of time. 3D animation programs also have their own method of "tweening".

---
Once one understands the terminology, one can move onto the drawing basics. These basics include understanding spacing and timing, keyframes, and “squash and stretch’ . The Animator’s Survival Kit included images that demonstrated the right way to conduct these drawings and the wrong way using every traditional animator’s friend, the bouncing ball.


The keys are the major points of the storytelling drawing. These are the drawings that show what happens in the story:
All of the movements in-between these main points are called the “tweens”. It was not until I started creating my own animation that I realized how extensive the frames really are. Apparently reading “ 24 frames equals one second” did not register how much work that is- and for only one second!!!


Squish and stretch refers to the movements that occur to the object when in motion. Nothing stays stiff.


References:
Beck, Jerry. Animation Art. Harper Collins, 2004.


Used as reference and aid in drawing:
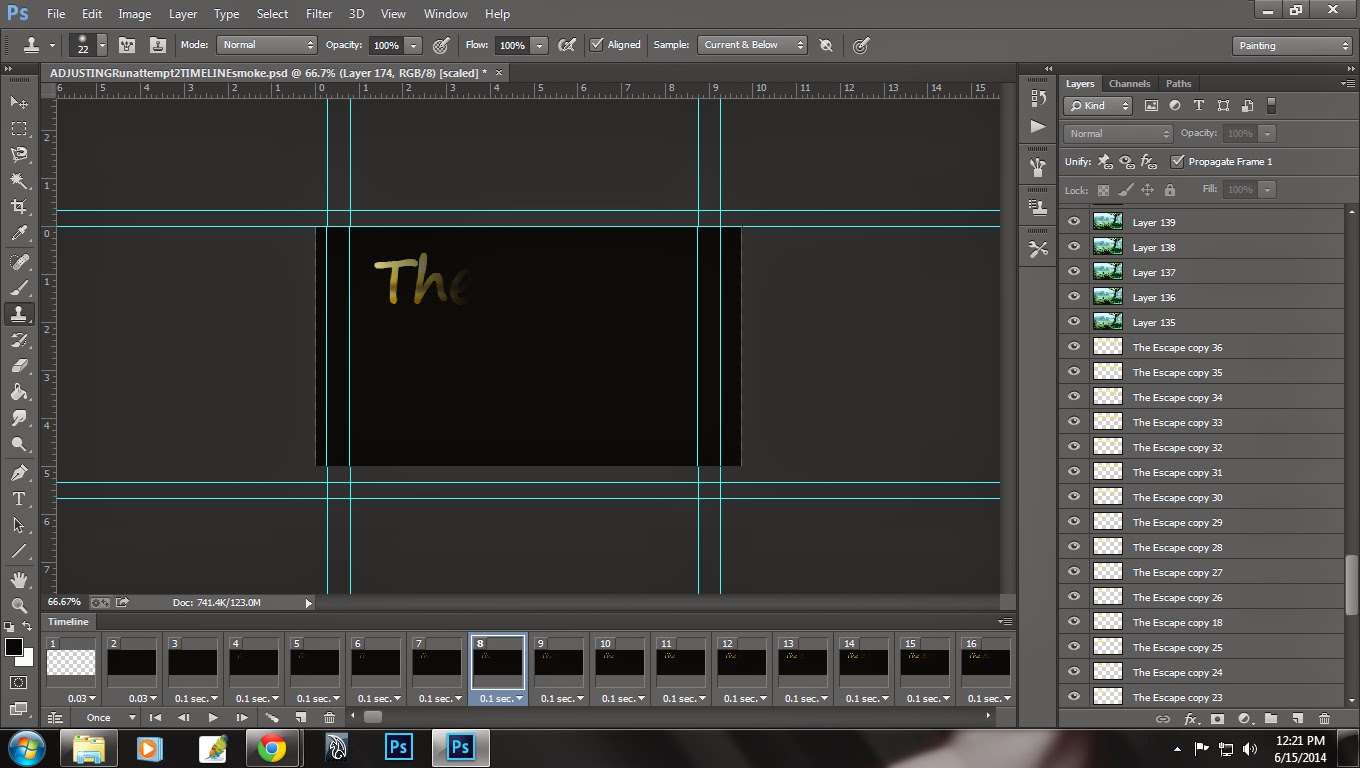
I watched how to execute animations in Photoshop.

Wednesday, May 21, 2014

Have Faith

Have faith. Those two words have lingered with me ever since they were uttered to me.


Faith has been lost upon me for some time now. At an early point in this project I realized I was going to need a little.
I was studiously putting most of my time into my animation and not liking the results I was getting. I have put in sooooo many hours of reading, researching, tinkering, creating, and recreating animations.

I started with my basic idea of creating a character running from point A to point B. I figured this was an ideal first ever animation project. I used an image I found on Google as the background. I did not want to create my own background because that itself is a huge animation, and I would need to put in a lot of time and watch more tutorials to get it right. The result is this:
and then this:


 Once I executed this, I immediately knew I was not happy with this, so I began thinking of another element to incorporate into this scene to spice things up and I knew I needed my own background.  I came up with a running horse:


I put the 2 characters together into a freshly made black and white background ( b & w is easy to speed paint with and I knew I could knock it out in no time).
( Thankfully this is not my final. I did see that some frames appeared 'stuck' at the beginning)

Can you guess what happened? This result still did not please me. I knew I was getting somewhere, but still was not there. In my photography, I love to make my image b&w and have a special item/area left in color. This creates a powerful, meaningful, and focused image. I thought this idea could work with my animation. Nope. Epic failure.  
I am feeling unsuccessful because I seem to have abandoned myself as an artist and forgot to make something with a meaning and something that has a little of me in it. I had to take a few days off and clear my head on how to make something I will be proud of, even if I don’t have a part of me in it.


After a few days away from my animation, I began to work on a new background and ways to make my characters appear in an interesting way in the setting. 

And no- I don't have all the time in the world. I have sacrificed a lot, but do it because I need to be proud of what I create.  


I have watched a lot of tutorials that taught me some fun effects. For one of my procrastination and ADD moments, I created this for my 3 year old niece who is obsessed with Frozen. I thought I would share. 

Wednesday, May 7, 2014

A moment, more like 100, of weakness


I am told venting is a good stress reliever. Personally, I prefer to workout more than once a day, but this option is not fixing my need for great results. 

I haaaaaaaaaaate being out of my comfort zone, as most individuals do. In regards to my animation, I feel like I am not obtaining top notch results. I also know that top notch is not going to come from my first ever animation.

 I have laid out all of the pieces I need to accomplish my final animation. I have rendered multiple animations of my character running to ensure the run appears smooth. I placed the character against a background I found and was not pleased with this simplicity, so I worked on a background of my own in b&w. I believe this consisted of 50ish frames or so. I did not want my animation to just consist of this character running from right to left,so I added that horse I created for SL into the mix as if she were being chased. I found an armored character and placed him on the horse to act as a villain. As I was putting this together, I ran into a few issues that prevented me from altering/adjusting/painting/etc. I also began hating my b&w background and scraped that and created a colored background. At this point I have my new background set in frames, 48 frames, and am starting to place my character, keeping in mind not to do what I have previously done. 

As I work on these trials, I read and watch tutorials and stray off of my project to create animations using techniques that I wish I could have done with my proposed project. I have failed at trying to incorporate these techniques due to my restricted drawings of my character. I have made a pretty cool animation that does not pertain to my proposed project- that made me happy and feel somewhat confident that I have a bleak chance at surviving in the digital world. 

Also: 

Wednesday, April 23, 2014

Second Life


I have taken a mini "break" away from my animation project to expand my knowledge and present a different animation for our Second Life Media Arts Festival. I did not stray too far from what I am working on, so it won't be anything to spectacular. 

There are four ways living creatures are mobile; 2 legs, 4 legs, fins, or wings. My animation study has provided me the opportunity to focus on 2 of the ways that I am most accustomed to- 2 and 4 legs. My character animation is the 2 legs, and my Second Life animation is going to be 4 legs. Through my Google searches, book reading, and video watching, I have noticed many beginners create either a dog or horse running animation. I found it would be in my best interest to do the same. So, I found an image from Google of the sequence of a horse running and I turned it into a very short animation. 
Using those 12 poses, I created a 2 second video of it running. This very minor video was created using 24 frames and took me a couple of days to achieve just the skeleton of the animation, even with using a pre-made drawing. I could not find any tutorials or readings, yet, on how to successfully make a background appear as it is moving/changing as the character runs, but I attempted this action with the knowledge I have. I am presently working on the basic coloring job of the frames. If I have time, I will try and add more detail to the horse. 
See you at the festival!